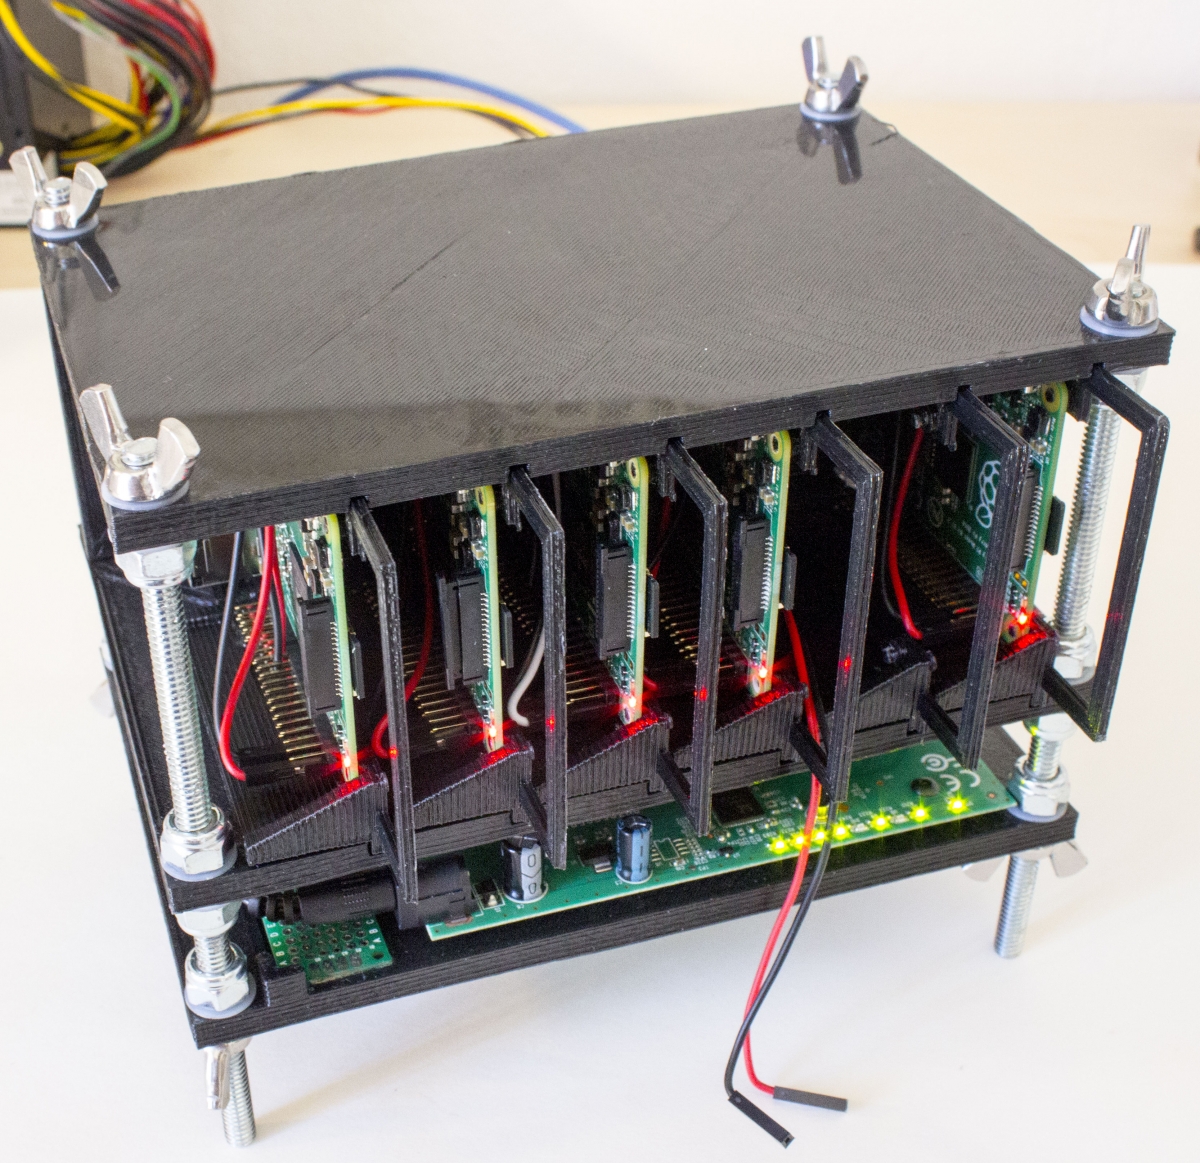
The Pi-Rack
I recently acquired a low-end 3d printer (0.3mm extrusion head) and after a few practice prints I decided to put my new skills to the test. I wanted to create a Raspberry Pi case, but I thought that would be a little boring. So the idea I settled on was creating something akin to a blade server - an enclosure that takes care of power and lan distribution, that houses several Pis. Overkill? Absolutely!
Armed with $10 calipers, a few RasPis to measure, and Sketchup Make, I created the Raspberry Pi Rack!

I posted many more photos, and even the source 3d model files you want to print your own, over on Hackaday - check it out! The bill of materials isn't crazy either:
- Under 1lb of PLA fillament
- 4x 1/4" by 6" threaded rods from Lowes
- 16x 1/4" lock nuts
- 8x 1/4" wing nugs (for easy disassembly - can absolutely be replaced with lock nuts for a more permanent assembly)
- 24x 1/4" by 1/2" nylon washers
- 1x male molex connector (I salvaged mine from computer fan parts)
- 1x prototype board
- 1x 6-pin SIP header
- 1x 6-pin SIP header, 90º angle
- 2x 6-pin SIP header, straight
- 12x M to F breadboard jumper
- 12x F to F breadboard jumpers
- 5 volt Ethernet switch
- 3x screw + nut sets (these are to secure the switch, I can't recall what I used. Something like a M3x15mm screw).
- 12x RJ45 (ethernet) headers
- Cat5/e cable (a couple feet should do the trick).
- ATX power supply. Any desktop computer has one of these.
Not counting the Raspberry Pis, all the supplies come in easily under $100. Not bad. Happy hacking!

